Azure infrastructure usage for EPiServer data import
In my current EPiServer Commerce solution import is done using custom Scheduled Jobs which are resource intensive. Jobs has to be run at night to not decrease performance of Web servers. When something fails during import process Scheduled Jobs should start from beginning and only next night. It is not good solution in global world where applications should run 24/7 and should perform well any time. Udi Dahan describes this issue well in article Status fields on entities - HARMFUL?. I created sample EPiServer CMS site with page import to test such architecture.
Sample site
I am not going to create EPiServer Commerce site for this demo, but use CMS site as the main idea for data import remains same.
I have described new EPiServer CMS project creation and hosting on Azure in previous blog post. Additionaly there are added simple start page and article page types to the project. Source code for the site and whole solution can be found on GitHub. For data import test I am going to import article pages from CSV file. Here is sample CSV file format:
Name,Intro,Content,ImageUrl
"The Car","The Car was presented today","Today the greatest of cars was presented - <b>The Car</b>.",http://www.publicdomainpictures.net/pictures/100000/velka/vintage-convertible-automobile.jpg
Solution architecture
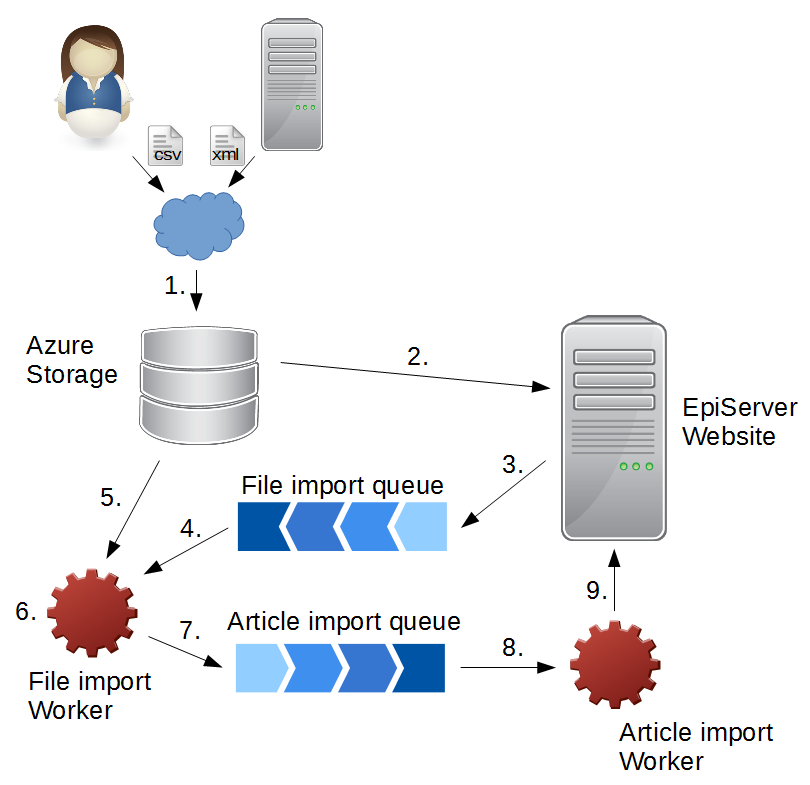
- The CSV file is uploaded onto Azure Storage.
- EPiServer Scheduled Job time to time looks for added import files.
- When file appears, it creates Service Bus message with file information and publishes onto the file import queue.
- File import Worker gets messages from file import queue,
- reads file from Storage,
- parses it and creates messages with article data (one message per article).
- Then it publishes messages with article data onto the article import queue.
- Second Worker - article import worker gets messages from article import queue
- and posts them to Web API endpoint on EPiServer site where new articles get created.
In this sample architecture we can see that any data transformation, file download/processing tasks can be moved to Workers. Such Workers can run paralelly and their throughput can be increased or decreased by needs or configured to autoscale. Also it offloads main EPiServer site from background processing tasks.
Storage for import data
When running Web application on Azure there is no available file system for storing large amount of data and it has to be uploaded somehow to the system for processing. In on-premise solution easiest way is to have separated disk for data and configure FTP for upload. In Azure I can use Azure Storage.
There are multiple ways how to upload import files to it. You can create the page for import file upload and use Storage API or use some tool. In this article I am going to use AzCopy tool.
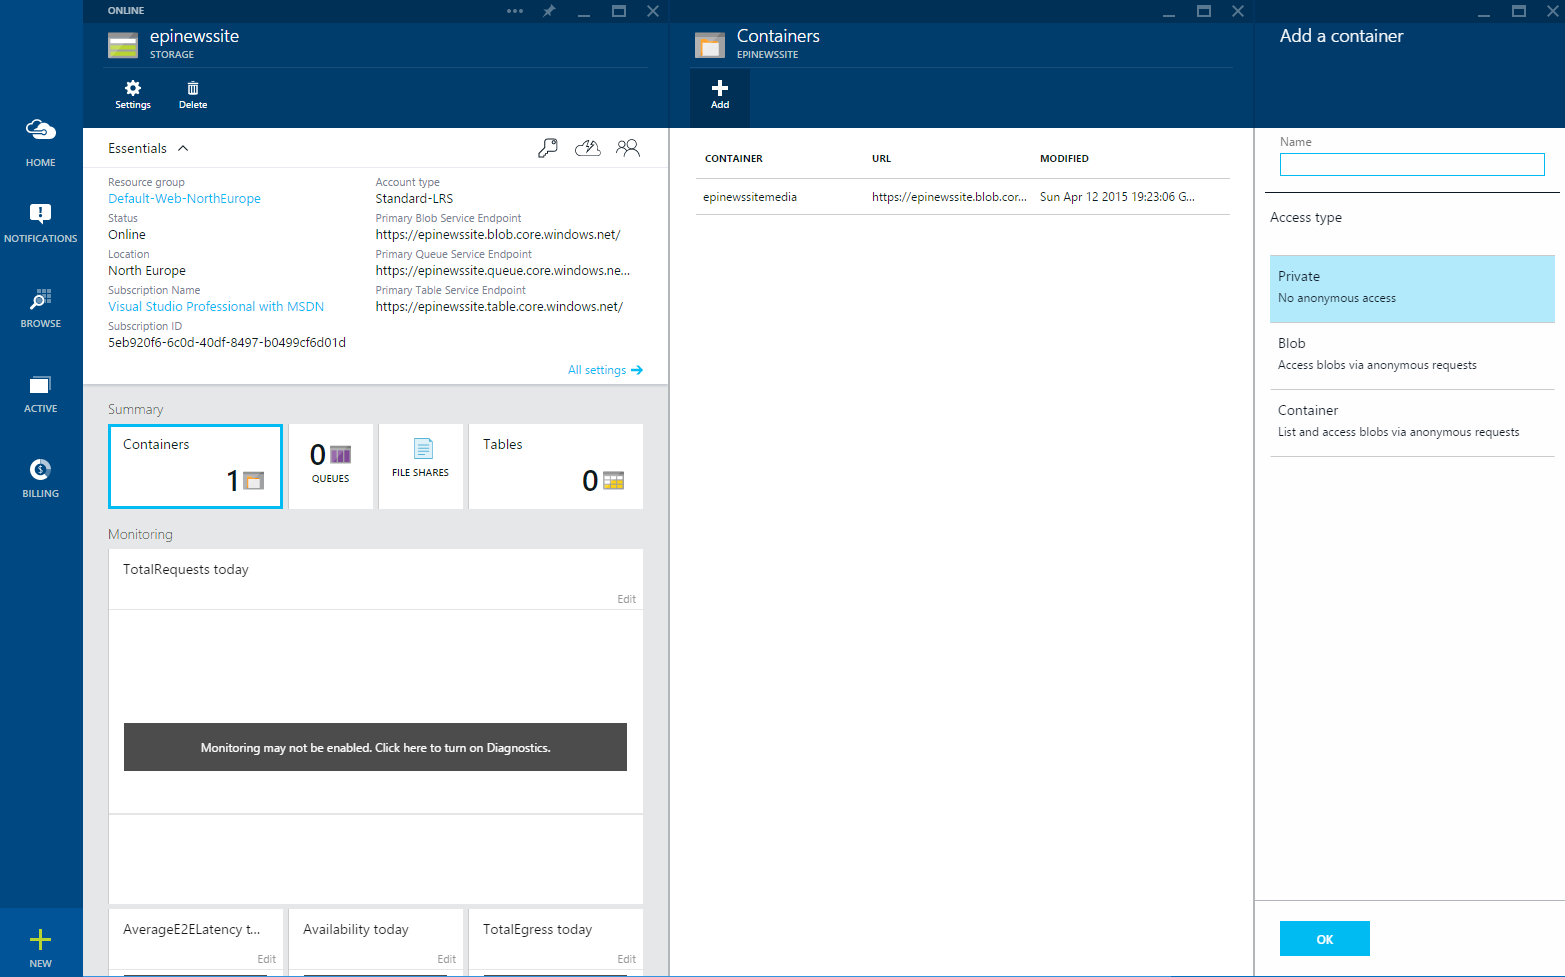
I already have created storage for EPiServer CMS and will use it for import data too, but I will add separate container and will call it epiimportdata.
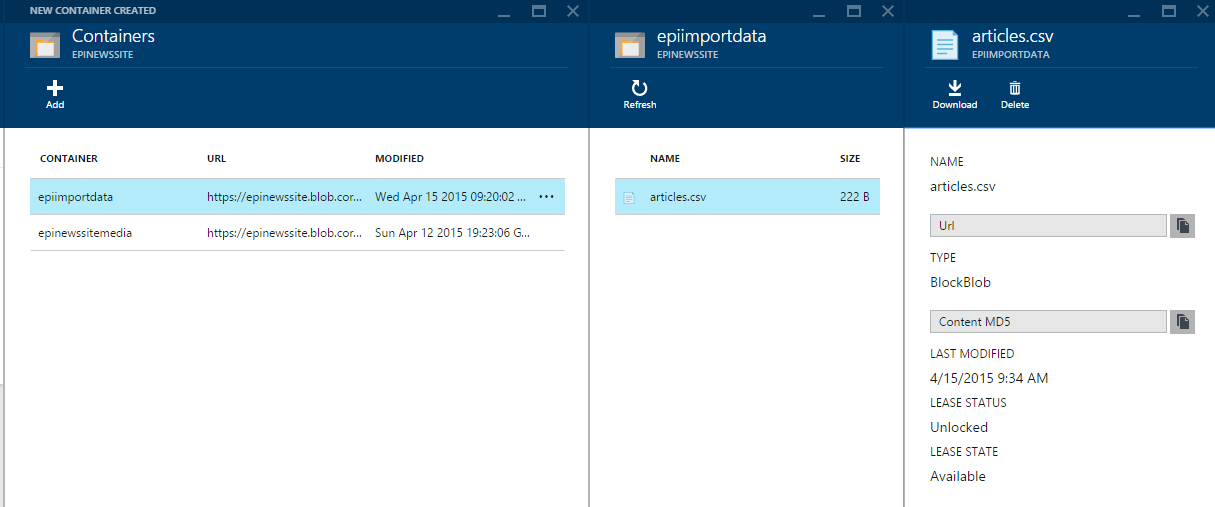
After container has been created I can use AzCopy to upload the file which is located on my computer - D:\Temp\data\articles.csv. Provide source directory for AzCopy, destination container URL and destination Storage primary or secondary key.
PS D:\Temp> AzCopy /Source:D:\Temp\data\ /Dest:https://epinewssite.blob.core.windows.net/epiimportdata /DestKey:{key} /S
Finished 1 of total 1 file(s).
[2015-04-15 09:34:14] Transfer summary:
-----------------
Total files transferred: 1
Transfer successfully:   1
Transfer skipped:        0
Transfer failed:         0
Elapsed time:            00.00:00:01
After upload completed you can view files in Azure Portal.
Processing
EPiServer Scheduled Job for Storage monitoring
When file is uploaded to the Storage, system should start processing it. There are several ways to crate Storage container file monitoring, for example, using WebJob.
I created EPiServer Scheduled Job which is running periodically and watching for new files in Storage. It uses Azure Storage API to list files and creates file DTO objects (ImportFile) with file (blob) data - Name and URL. Then it creates message to publish on ImportQueue queue in ServiceBus.
[ScheduledPlugIn(DisplayName = "Init import", SortIndex = 2000)]
public class ImportInitializationJob : JobBase
{
    public override string Execute()
    {
        var container = CreateStorageContainer();

        foreach (var item in container.ListBlobs()
                                        .OfType<CloudBlockBlob>())
        {
            var importFile = new ImportFile
            {
                Name = item.Name, Uri = item.Uri
            };
            var message = new BrokeredMessage(importFile);
            QueueConnector.Client.Send(message);
        }

        return "Success";
    }

    private const string ContainerName = "epiimportdata";

    private static CloudBlobContainer CreateStorageContainer()
    {
        var cn = ConfigurationManager
                        .ConnectionStrings["EPiServerAzureBlobs"]
                        .ConnectionString;
        var storageAccount = CloudStorageAccount.Parse(cn);
        var blobClient = storageAccount.CreateCloudBlobClient();

        var container = blobClient.GetContainerReference(ContainerName);
        container.CreateIfNotExists();
        return container;
    }
}
I am reusing EPiServer Azure Storage, but creating separate container. In production system you would like to move processed files to another container or other path before sending message to the queue, that next time when Scheduled Job is running, it will not load same file again.
For DTO objects I created separate library project called Contracts. I am referencing it in all projects which produces or consumes messages from queues.
QueueConnector in this example is taken from article .NET Multi-Tier Application Using Service Bus Queues. I just changed queue name and created namespace manager from connection string. I reused same ServiceBus namespace as used for EPiServer - epinewssite.
public static class QueueConnector
{
    public static QueueClient Client;

    public const string Namespace = "epinewssite";
    public const string QueueName = "ImportQueue";

    public static NamespaceManager CreateNamespaceManager()
    {
        var cn = ConfigurationManager
                .ConnectionStrings["EPiServerAzureEvents"]
                .ConnectionString;
        return NamespaceManager.CreateFromConnectionString(cn);
    }

    public static void Initialize()
    {
        ServiceBusEnvironment.SystemConnectivity.Mode =
            ConnectivityMode.Http;

        var namespaceManager = CreateNamespaceManager();

        if (!namespaceManager.QueueExists(QueueName))
        {
            namespaceManager.CreateQueue(QueueName);
        }

        var messagingFactory = MessagingFactory.Create(
            namespaceManager.Address,
            namespaceManager.Settings.TokenProvider);
        Client = messagingFactory.CreateQueueClient(QueueName);
    }
}
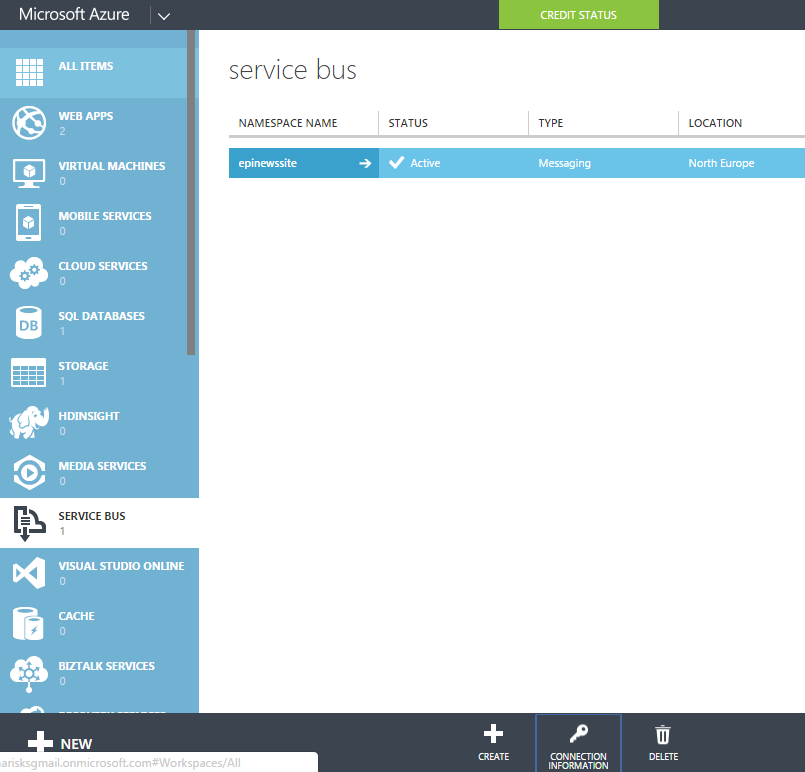
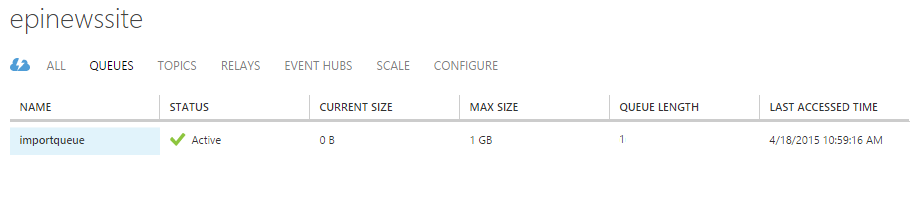
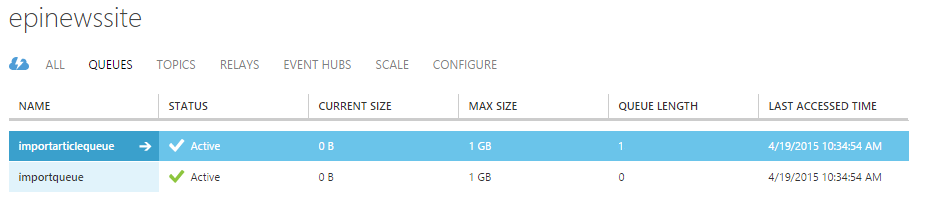
Now can try and run Scheduled Job. Deploy new version of Web site to Azure and run Sheduled Job. Then in old Azure Portal click Service Bus in the menu on the left and from the list choose namespace.
Then open Queues tab and you should see that in importqueue QUEUE LENGTH column has value 1.
Import file Worker
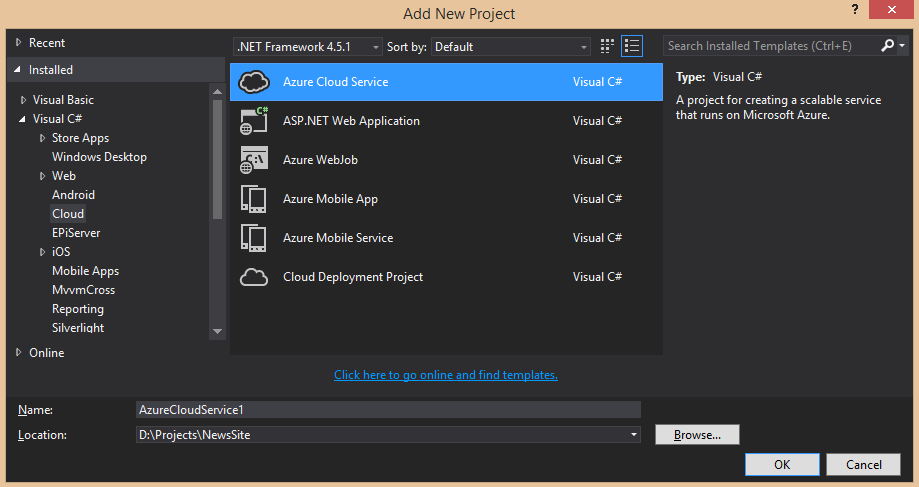
First of all I have to create Azure Cloud Service project.
Then choose to create Worker Role with Service Bus Queue and rename it by clicking on small pencil on the right and type it's name.
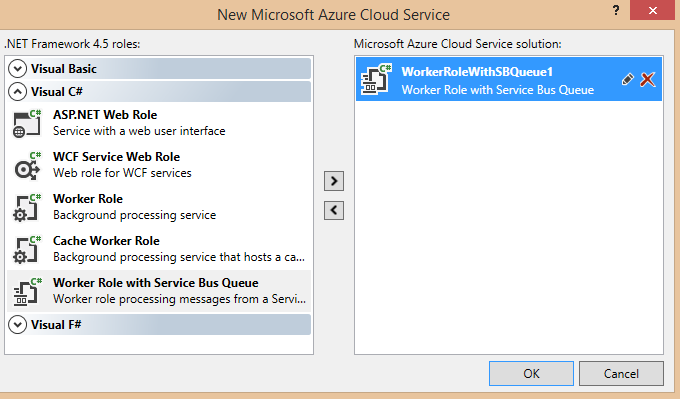
Two new projects will be created - Worker Role project and Azure Cloud Service project. Azure Cloud Service project contains all needed configuration and also is responsible for deployment to Azure.
Worker Role project contains WorkerRole.cs which is starting point. As I created Worker Role with Service Bus Queue it already contains code to handle messages from queue.
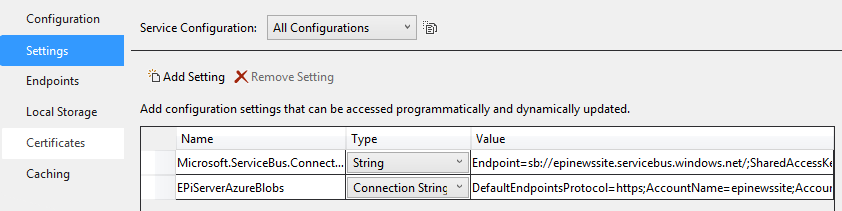
First of all I am going to configure connection strings for Service Bus and Storage. In the Azure Cloud Service project, right-click on the Worker Role under Roles folder and select Properties. Then select Settings tab on the left. There is already setting for Service Bus Queue, but I have to change it to my Service Bus connection string. Then I also added Storage connection string.
In WorkerRole.cs OnStart method configure two Service Bus clients - one for incomming messages and other for outgoing. In production system you might have multiple incoming and outgoing messages, but for this example I use one one for each direction. To read Worker Role settings I am using CloudConfigurationManager.
const string InQueueName = "ImportQueue";
const string OutQueueName = "ImportArticleQueue";

QueueClient InClient;
QueueClient OutClient;

public override bool OnStart()
{
    ServicePointManager.DefaultConnectionLimit = 12;

    var cn = CloudConfigurationManager.GetSetting("Microsoft.ServiceBus.ConnectionString");
    var namespaceManager = NamespaceManager.CreateFromConnectionString(cn);
    if (!namespaceManager.QueueExists(InQueueName))
    {
        namespaceManager.CreateQueue(InQueueName);
    }

    if (!namespaceManager.QueueExists(OutQueueName))
    {
        namespaceManager.CreateQueue(OutQueueName);
    }

    InClient = QueueClient.CreateFromConnectionString(cn, InQueueName);
    OutClient = QueueClient.CreateFromConnectionString(cn, OutQueueName);
    return base.OnStart();
}
Then I created method to initialize Storage Container.
private const string ContainerName = "epiimportdata";

private static CloudBlobContainer CreateStorageContainer()
{
    var connectionString = CloudConfigurationManager.GetSetting("EPiServerAzureBlobs");
    var storageAccount = CloudStorageAccount.Parse(connectionString);
    var blobClient = storageAccount.CreateCloudBlobClient();

    var container = blobClient.GetContainerReference(ContainerName);
    container.CreateIfNotExists();
    return container;
}
Now I am rady to consume messages. Execution of the worker is done in Run method. First of all I am reading message into my DTO - ImportFile, then getting blob reference for file by it's name. I am reading and parsing CSV file in ReadArticles method and creating sequence of Artice DTOs. When it's done publish Article DTOs on outgoing queue.
public override void Run()
{
    Trace.WriteLine("Starting processing of messages");

    InClient.OnMessage((receivedMessage) =>
        {
            try
            {
                Trace.WriteLine("Processing Service Bus message: " +
                                 receivedMessage.SequenceNumber.ToString());

                var importFile = receivedMessage.GetBody<ImportFile>();
                var container = CreateStorageContainer();
                var blob = container.GetBlockBlobReference(importFile.Name);

                var articles = ReadArticles(blob).ToList();

                articles.ForEach(article =>
                {
                    var message = new BrokeredMessage(article);
                    OutClient.Send(message);
                });

                receivedMessage.Complete();
            }
            catch(Exception ex)
            {
                Trace.TraceError("Exception: {0} \n Stack Trace: {1}",
                                    ex.Message, ex.StackTrace);
            }
        });

    CompletedEvent.WaitOne();
}
For CSV parsing I am just reading file line by line and split columns by comma, but in production solution I probably would use some library to do it, for example, CSV helper.
private static IEnumerable<Article> ReadArticles(CloudBlockBlob blob)
{
    var text = blob.DownloadText();

    using (var sr = new StringReader(text))
    {
        string line;
        var row = 0;
        while ((line = sr.ReadLine()) != null)
        {
            row++;
            if (row == 1) continue;

            var fields = line.Split(',');
            yield return new Article
            {
                Name = fields[0],
                Intro = fields[1],
                Content = fields[2],
                ImageUrl = fields[3]
            };
        }
    }
}
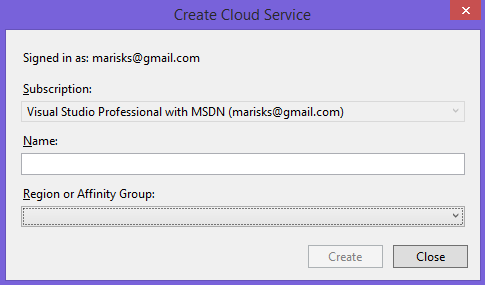
Now Worker is ready for deployment. Right-click on Azure Cloud Service project and choose Publish. Sign in by providing credentials and create new cloud service - provide name and region.
Then choose environment - Staging or Production, build configuration and service configuration.
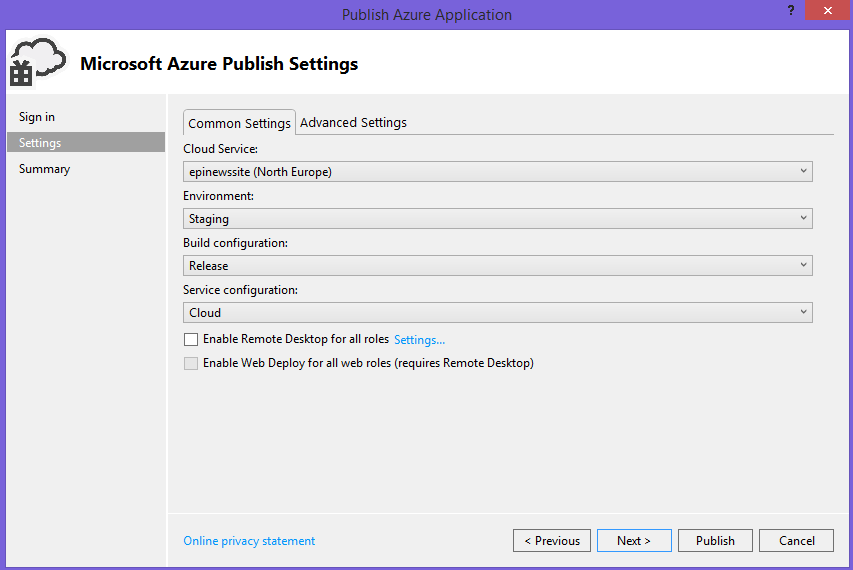
After all settings are configured click Publish. You can see progress in Azure Activity Log.

Deployment will take quite a lot of time. After deployment finished, Worker will run automatically and will consume messages from queue. Now we should have two queues and second queue will contain one message.
Import articles Worker
For article import I will create another Worker. Follow same steps as for first Worker - create new Worker Role with Service Bus, configure Service Bus connection string, but skip Storage configuration as I will not use it in new Worker. Also I will need only one queue for incomming Article messages - ImportArticleQueue.
const string InQueueName = "ImportArticleQueue";

QueueClient InClient;

public override bool OnStart()
{
    ServicePointManager.DefaultConnectionLimit = 12;

    var cn = CloudConfigurationManager.GetSetting("Microsoft.ServiceBus.ConnectionString");
    var namespaceManager = NamespaceManager.CreateFromConnectionString(cn);
    if (!namespaceManager.QueueExists(InQueueName))
    {
        namespaceManager.CreateQueue(InQueueName);
    }

    InClient = QueueClient.CreateFromConnectionString(cn, InQueueName);
    return base.OnStart();
}
Then I am going to consume Article messages and just post to Web API end-point which I created in EPiServer site.
public override void Run()
{
    Trace.WriteLine("Starting processing of messages");

    InClient.OnMessage((receivedMessage) =>
        {
            try
            {
                // Process the message
                Trace.WriteLine("Processing Service Bus message: "
                                + receivedMessage.SequenceNumber.ToString());

                var article = receivedMessage.GetBody<Article>();

                using (var client = CreateClient())
                {
                    var str = JsonConvert.SerializeObject(article);
                    var content = new StringContent(str, Encoding.UTF8, "text/json");
                    var result = client.PostAsync("api/article", content).Result;
                    result.EnsureSuccessStatusCode();
                }
            }
            catch
            {
                // Handle any message processing specific exceptions here
            }
        });

    CompletedEvent.WaitOne();
}

private HttpClient CreateClient()
{
    var client = new HttpClient {BaseAddress = new Uri("http://epinewssite.azurewebsites.net/")};
    client.DefaultRequestHeaders.Accept.Clear();
    client.DefaultRequestHeaders.Accept.Add(new MediaTypeWithQualityHeaderValue("application/json"));
    return client;
}
Web API controller just creates new page if it does not exist yet.
public void Post(Article article)
{
    var existing = _contentRepository
                        .GetChildren<ArticlePage>(ContentReference.StartPage)
                        .FirstOrDefault(x => x.Name == article.Name);
    if (existing != null)
    {
        return;
    }

    var newArticlePage = _contentRepository
                            .GetDefault<ArticlePage>(ContentReference.StartPage);

    newArticlePage.Name = article.Name;
    newArticlePage.Intro = article.Intro;
    newArticlePage.Content = new XhtmlString(article.Content);

    _contentRepository.Save(newArticlePage, SaveAction.Publish, AccessLevel.NoAccess);
}
Now publish Cloud Service again and will see that message disappears from queue and new article appears in EPiServer CMS. Import process is created and working.
Summary
For smaller tasks like in this example, it might not be reasonable to use all this infrastructure and simpler solution would be just creating some Scheduled Job or page for data upload and import. But more complex import process could benefit from such solution. For example, such process might require to transform product CSV file, download sales data from 3rd party service, download images and thumbnails from media service and in the result package all data and import with EPiServer Commerce Service API.
Azure might not only improve your import process. I was using Azure Storage and Service Bus Queues, but there are available lot more services you can use for your solution needs. Just use them when needed.