EPiServer CMS site as Azure Web App
While EPiServer provides documentation on how to do deployment to Azure I want to document my experience.
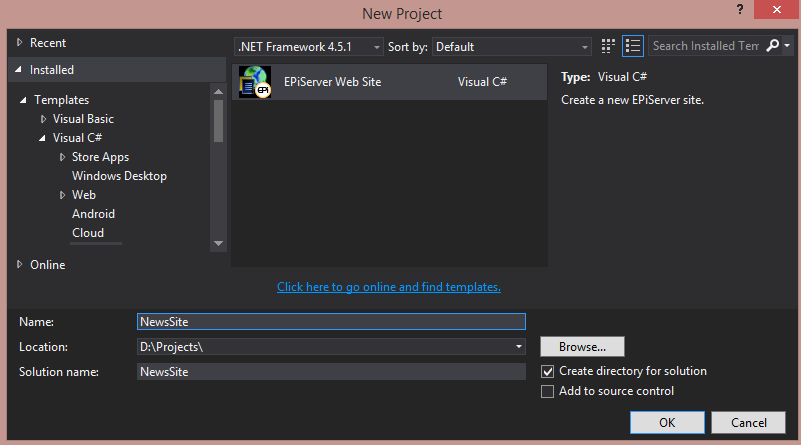
Creating EPiServer CMS site
So first task is creating new EPiServer CMS site. This is really easy using Visual Studio Extension for EPiServer CMS. Extension adds EPiServer project template and several item templates to Visual Studio.
Start creating project using EPiServer Web Site project template.
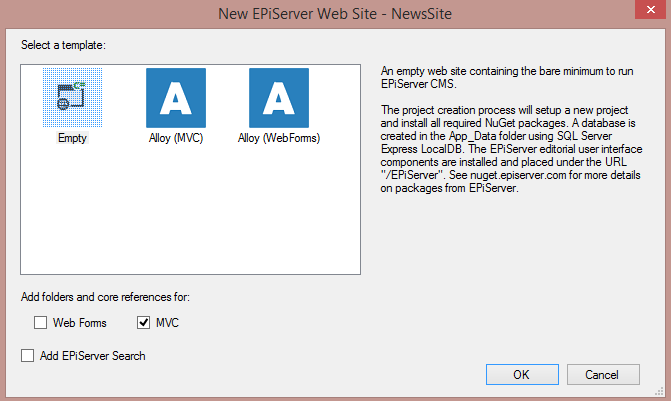
Then select type of the project. I am creating Empty MVC project. Also uncheck Add EPiServer Search. I am not going to use search and it also requires additional configuration steps.
According to documentation I will need EPiServer.Azure NuGet package installed from EPiServer NuGet Feed.

Setting up Azure Web App for EPiServer
I am going to use new Azure Portal. Documentation describes old portal.
Creating Azure Web App
Start creating new Web App by clicking New button on the left bottom corner. Then select Web + Mobile -> Web app. Provide URL of the site and select application service plan. I also can create new application service plan here by clicking Or create new. Then check Add to Startboard - this will allow me to easier find site later. After it's done, click Create.
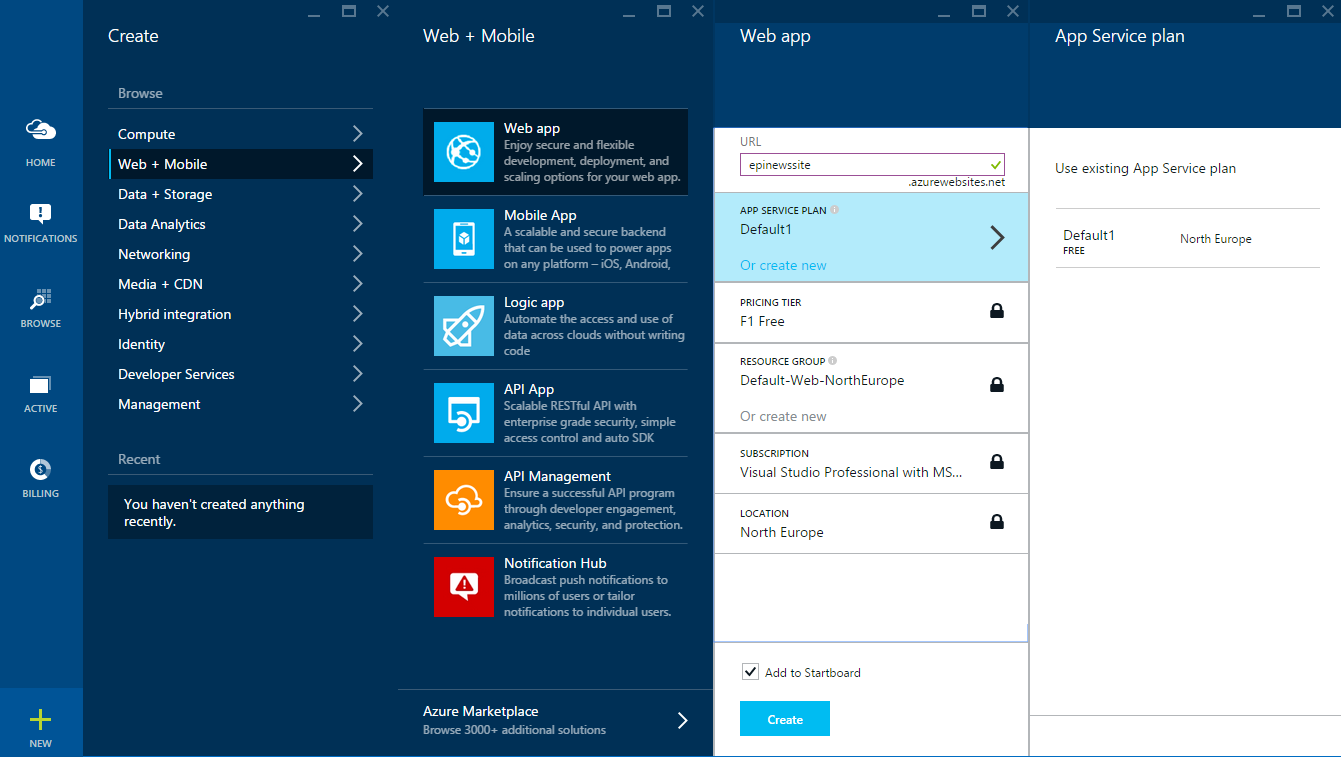
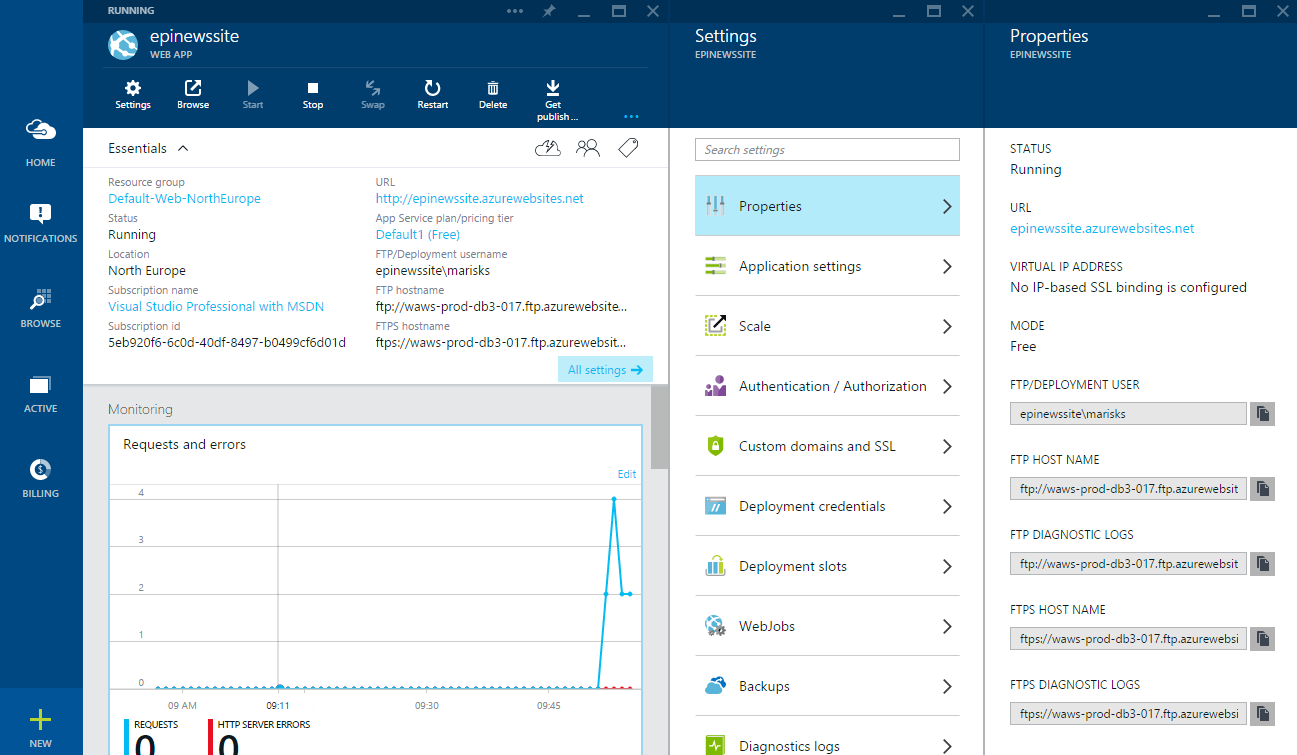
It will take some time while Web App is creating. After it is created, I can open Web App management view from Startboard or by clicking Browse on the left menu.
Creating SQL Database
New portal do not have an option to create SQL Database while creating new Web App. So I have to do myself ourselves.
Start creating SQL Database by clicking New button, then select Data + Storage -> SQL Database.
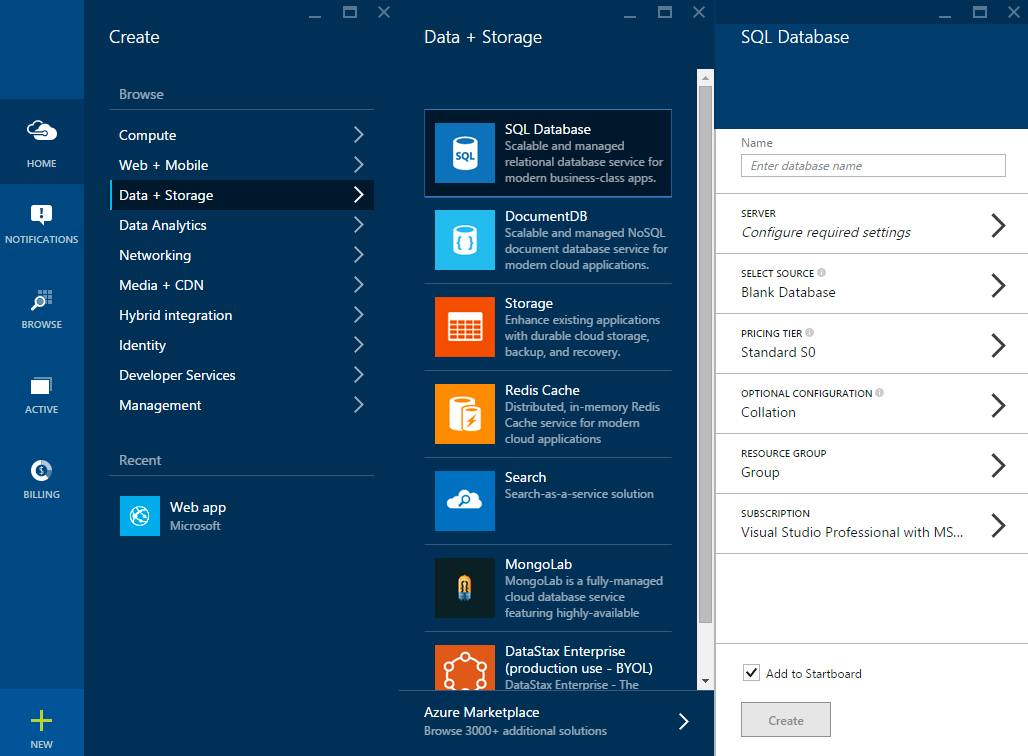
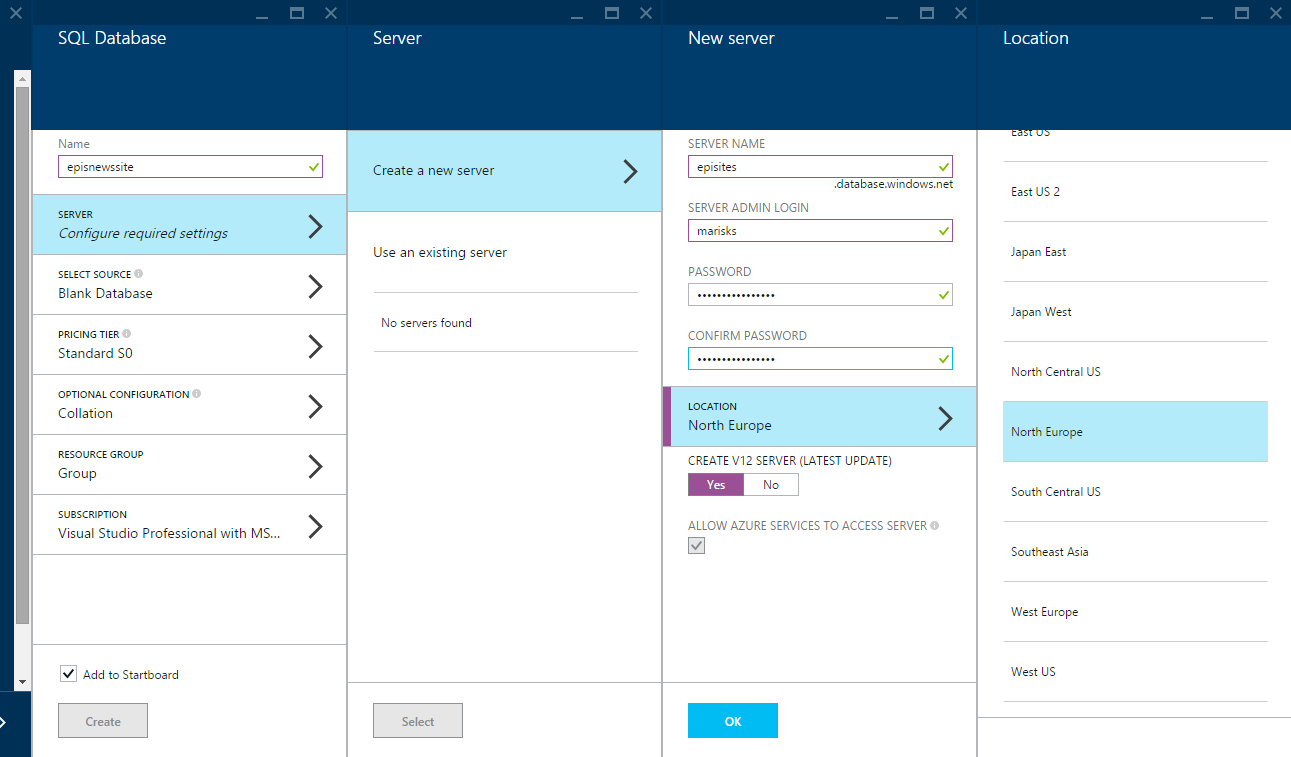
Provide new database name and select or create new server. I am creating new server as I do not have one yet.
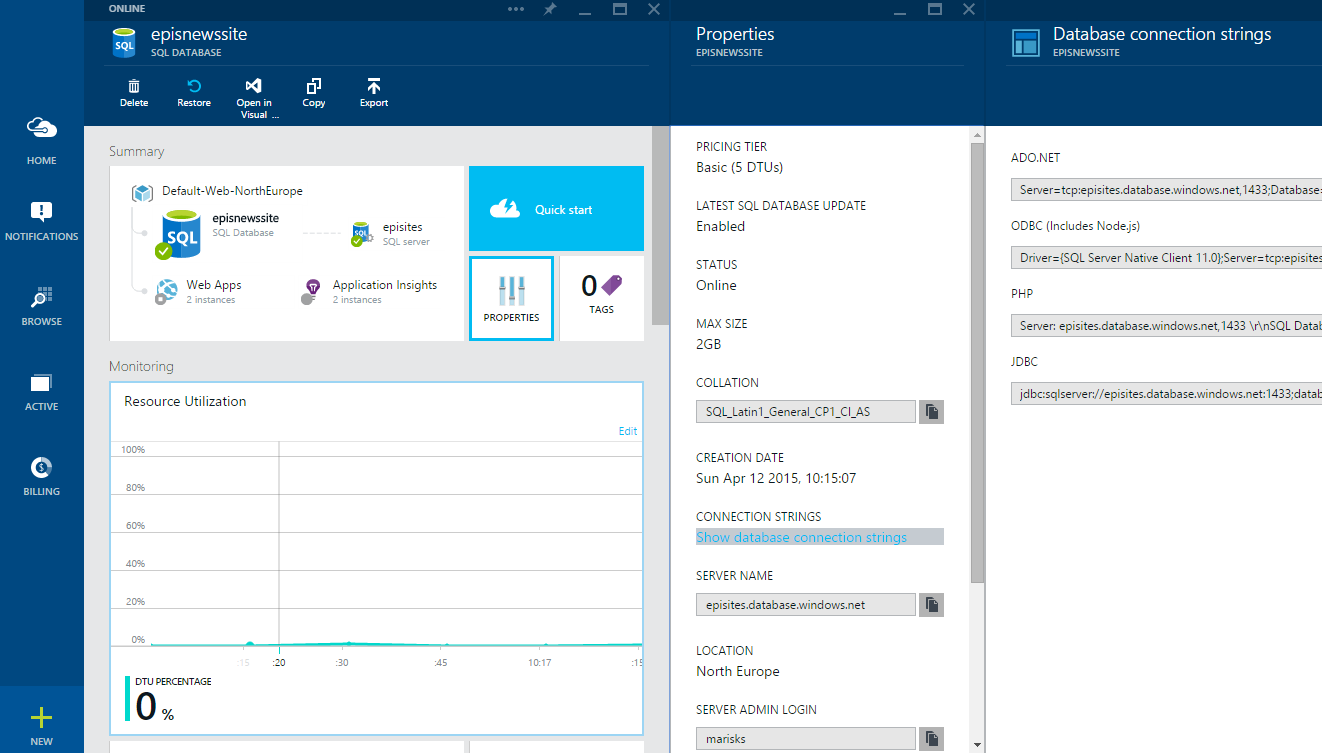
I will use Blank database as source. Then I can select pricing, provide database collation and select or create resource group, but I will leave default values here. I will also add DB to Startboard by checking Add to Startboard. Wait until DB is created and then open SQL Database management view where I can see DB status and Properties like Connection Strings.
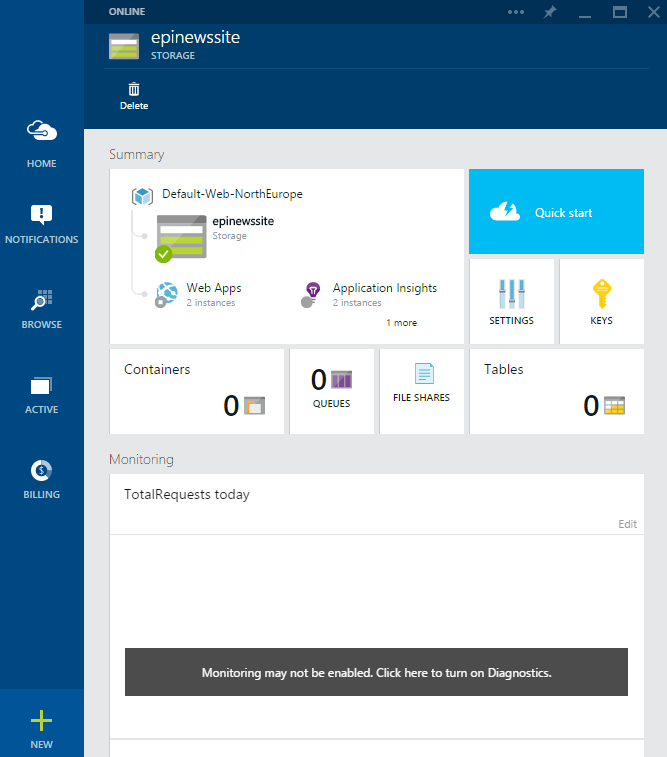
Creating Azure Storage
Azure Web Apps do not have filesystem as we used to in Windows. Instead I have to create Azure Storage to store files.
Start creating it by clicking on New, select Data + Storage -> Storage.
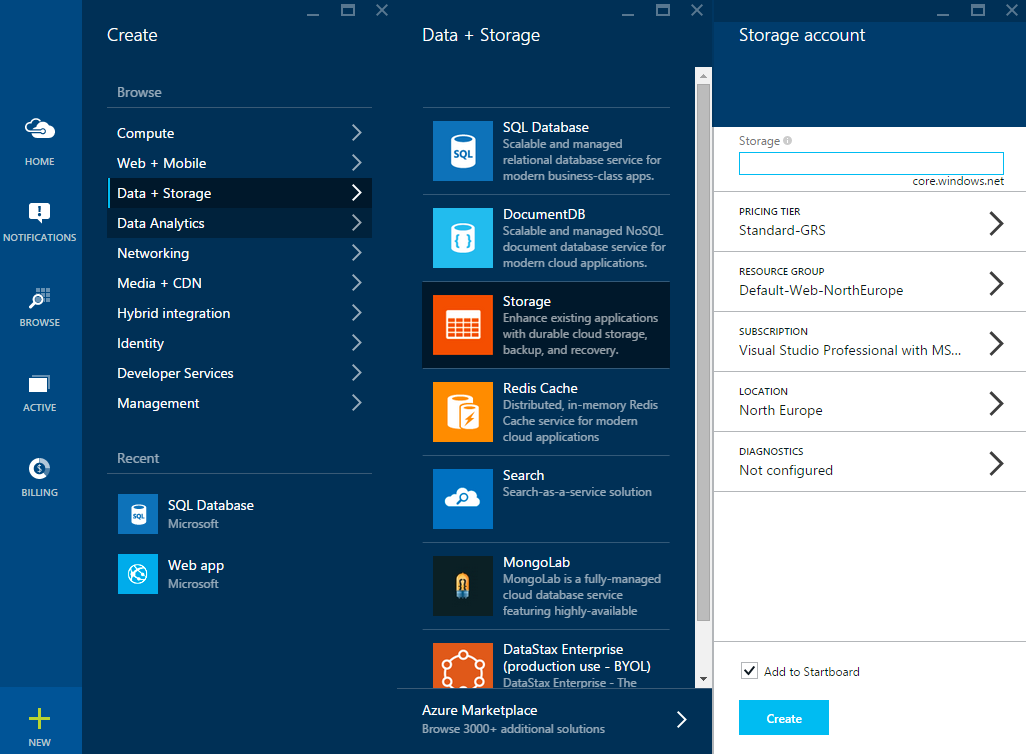
Provide name of the Storage (it should be in lowercase as described in documentation), select pricing, select or create resource group, select location and if needed can enable diagnostics. Storage creation also will take some time and after it is created, I can navigate to Storage management view.
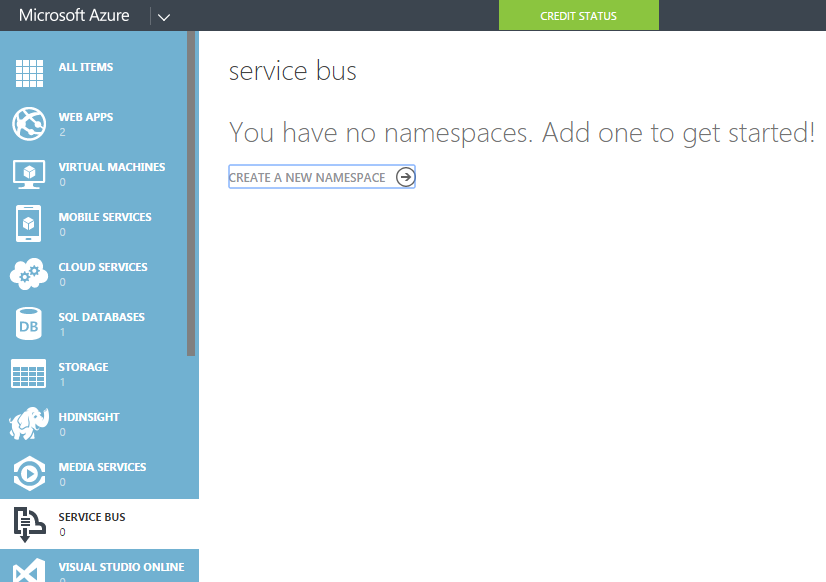
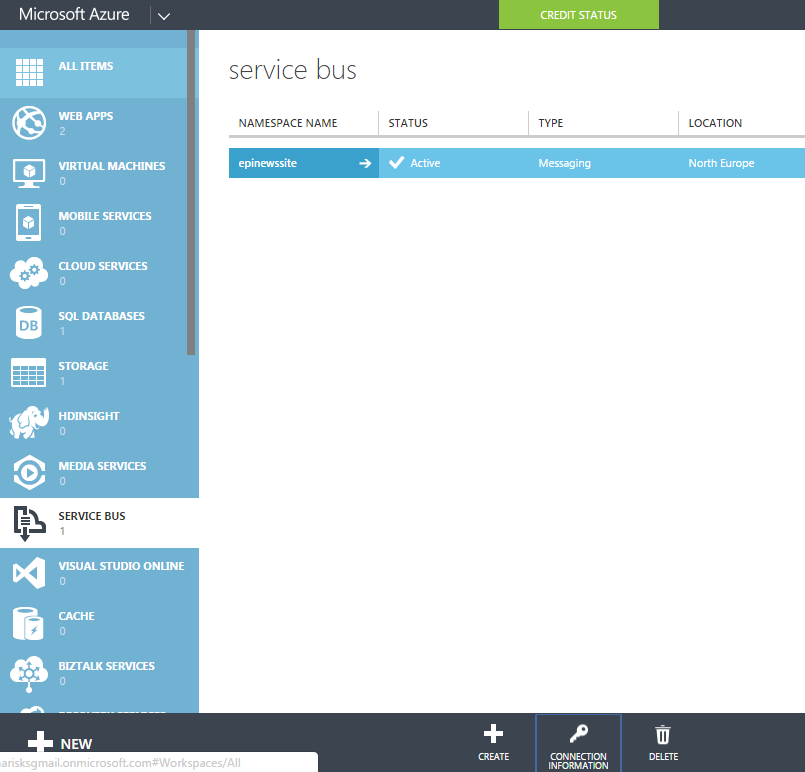
Creating Service Bus
Service Bus in EPiServer is used to handle messages between multiple site instances (if those are created for scaling purposes). Service Bus creation is not available in new Azure Portal at the time of writing this blog post. I have to login into old portal first.
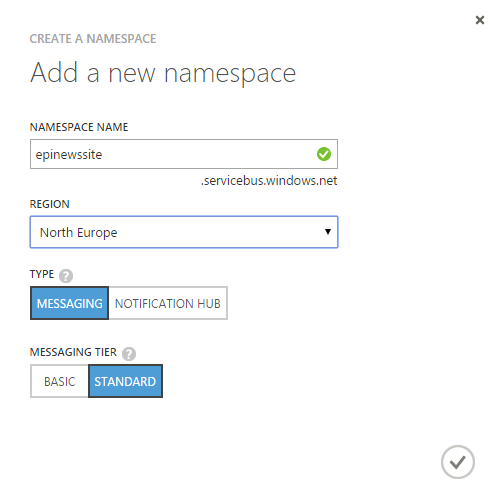
Create Service Bus by selecting Service Bus from left menu and click Create a new namespace.
Then provide namespace name, select region, type - MESSAGING and messaging tier - STANDARD as it is described in EPiServer documentation.
Configuring EPiServer CMS project
First of all I have to provide configuration for Storage and Service Bus. Open Visual Studio project and open Web.config. In episerver.framework section add blob and event configuration.
<blob defaultProvider="azureblobs">
  <providers>
    <add name="azureblobs" type="EPiServer.Azure.Blobs.AzureBlobProvider,EPiServer.Azure"
          connectionStringName="EPiServerAzureBlobs" container="epinewssitemedia"/>
  </providers>
</blob>
<event defaultProvider="azureevents">
  <providers>
    <add name="azureevents" type="EPiServer.Azure.Events.AzureEventProvider,EPiServer.Azure"
          connectionStringName="EPiServerAzureEvents" topic="epinewssiteevents"/>
  </providers>
</event>
container and topic are the names for Storage container and Service Bus topic accordingly. Those should be unique per Web App and Storage or Service Bus. connectionStringName attribute value is the name of connection string from connectionStrings section.
I have to configure three connection strings - for SQL Database, Storage and Service Bus. First copy connection string for SQL Database which I can find in new Azure Portal in Properties view for SQL Database.
I have to change password in the connection string to my user's password and add MultipleActiveResultSets=True as required by EPiServer documentation.
<add name="EPiServerDB"
    connectionString="Server=tcp:episites.database.windows.net,1433;Database=episnewssite;User ID=marisks@episites;Password={your_password_here};Encrypt=True;TrustServerCertificate=False;Connection Timeout=30;MultipleActiveResultSets=True"
    providerName="System.Data.SqlClient" />
Next add connection string for Storage with same name as configured for blobs. I found connection string in Storage management view under Keys.
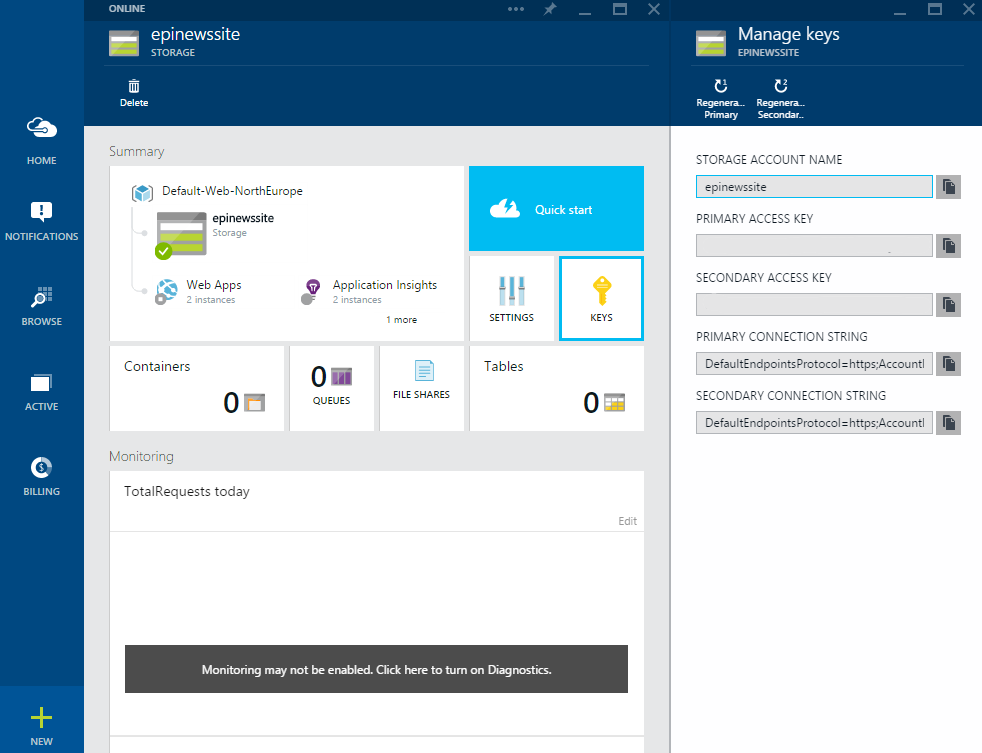
Copy primary connection string and add it to Web.config.
<add name="EPiServerAzureBlobs"
    connectionString="DefaultEndpointsProtocol=https;AccountName=epinewssite;AccountKey={the key}" />
And last connection string is for Service Bus. In old Azure Portal select Service Bus in left menu and Connection information on the bottom.
Copy connection information from modal window.

And add copied connection string to Web.config.
<add name="EPiServerAzureEvents"
    connectionString="Endpoint=sb://epinewssite.servicebus.windows.net/;SharedAccessKeyName=RootManageSharedAccessKey;SharedAccessKey={the key}" />
Deploy to Azure
The simplest way to deploy to Azure is with Visual Studio publishing. Right click on project in Solution Explorer and select Publish.
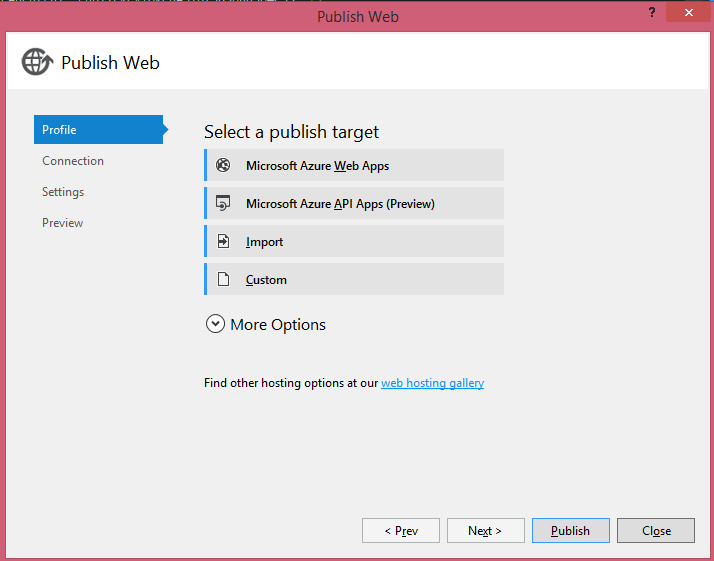
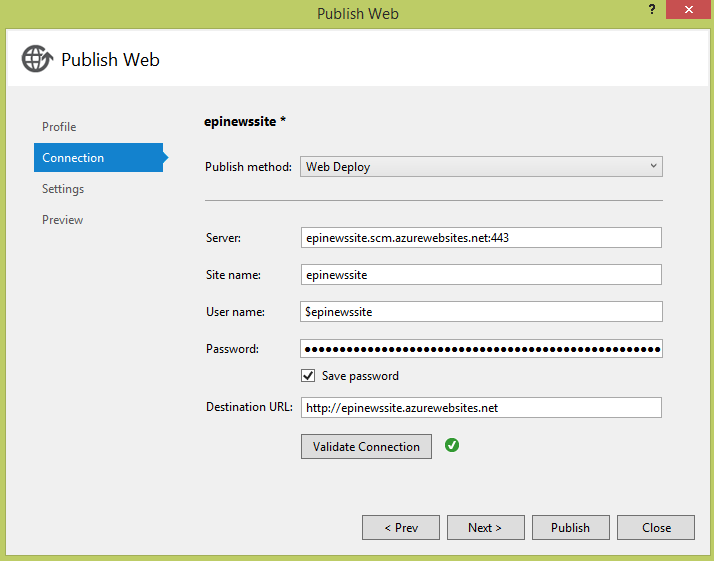
Then select Microsoft Azure Web Apps, provide credentials and select the site to deploy. Then it will open the view with connection details and I can verify connection.
In the next view I can select build configuration to deploy, configure file publishing and databases. For EPiServerDB check Update database.
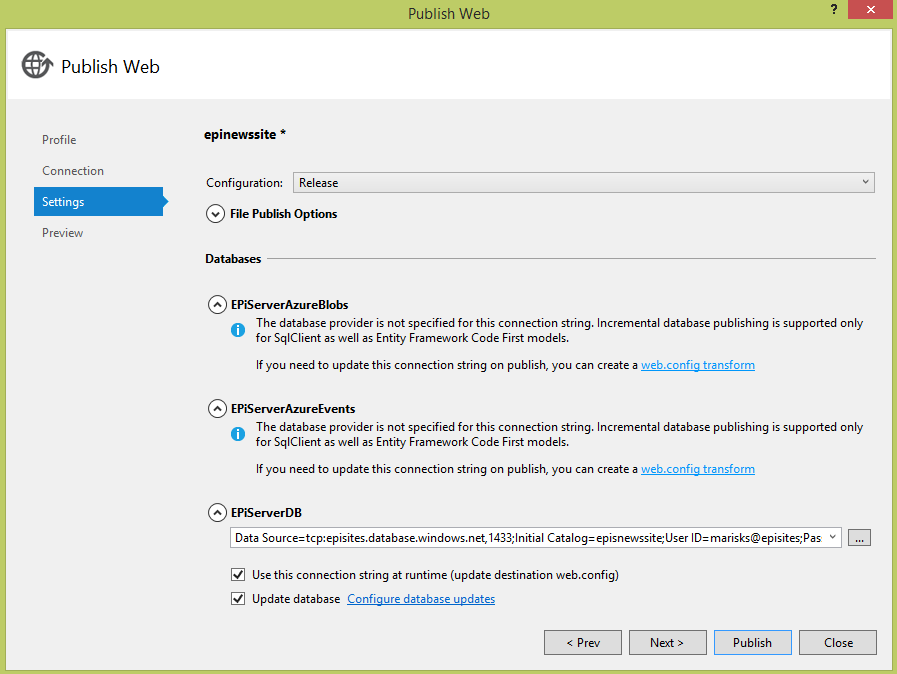
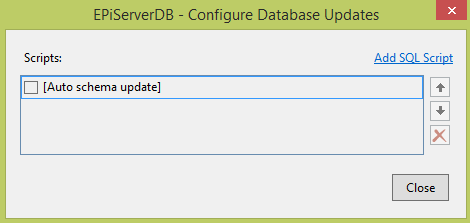
Then click Configure database updates where in modal window uncheck Auto schema update and click Add SQL Script and select CMS sql script from [SolutionDir]\packages\EPServer.CMS.Core.{version}\tools\EPiServer.Cms.Core.sql.
Now I am ready to Publish.
Creating admin user
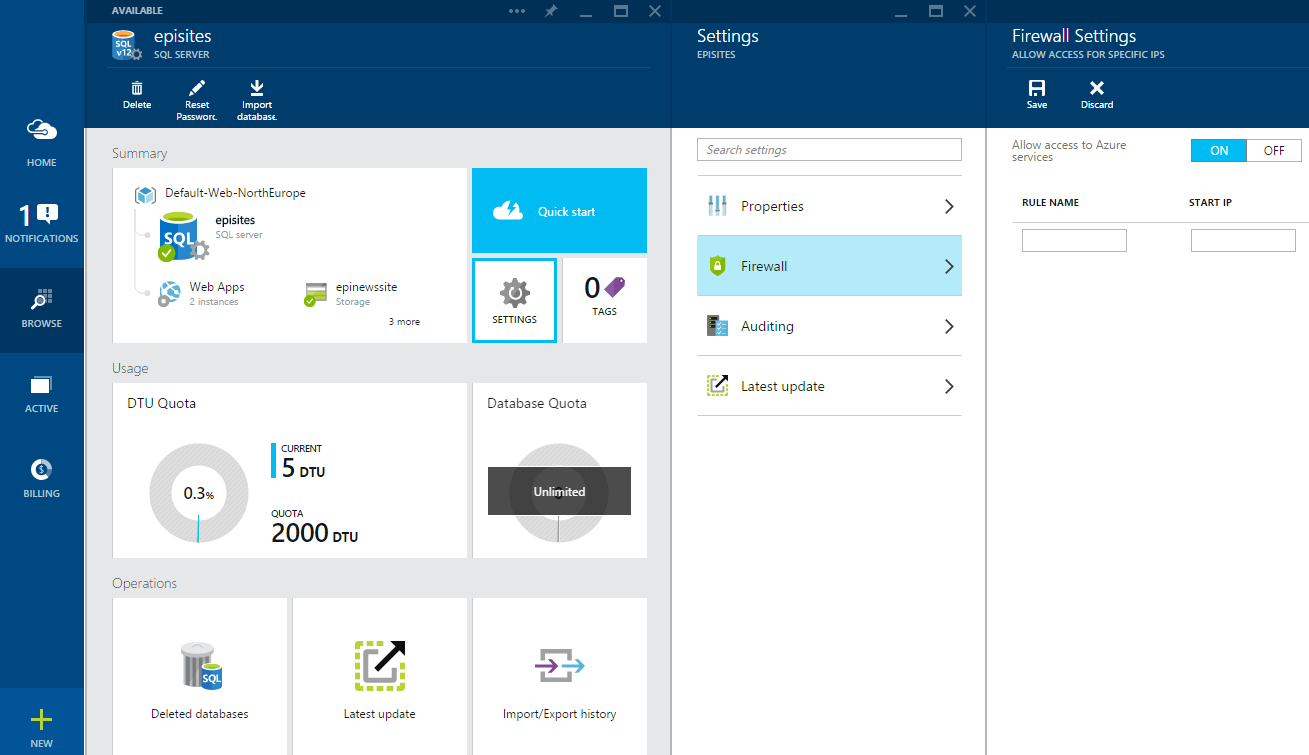
First of all configure SQL Database to allow local computer access it. In new portal click Browse in left menu, select SQL Servers and select the server. Then in server settings select Firewall, add rule name and local computer public IP address to both IP address text boxes. Then click Save.
Now I am able to open EPiServer CMS administration interface locally by logging in with local Windows administrator credentials. Then go to CMS -> Admin -> Administer Groups and create WebAdmins and WebEditors groups. After that got to CMS -> Admin -> Create User and create new user which should be added to both previously created groups.
When it is done I am able to login into EPiServer CMS administration interface with newly created user on deployed EPiServer Azure site. Now I can start creating my site - add page types, controllers, views, create content and configure EPiServer website as needed.
For additional information and configuration refer to EPiServer documentation.