Configuring read-only access to the Service API with ASP.NET Identity
Configuring read-only Service API access
First of all, ASP.Identity should be configured for Service API. The process for EPiServer 10 is same as for EPiServer 9.
Creating read-only user group and user
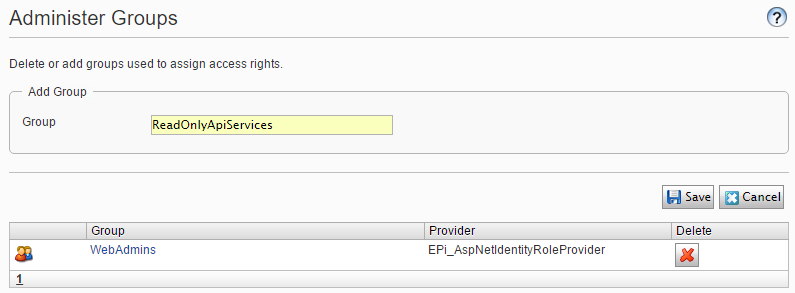
Creating user group and a user are simple. With AspNetIdentity package default administrative user interface works. Navigate to the Admin -> Administer Groups and add a new group.
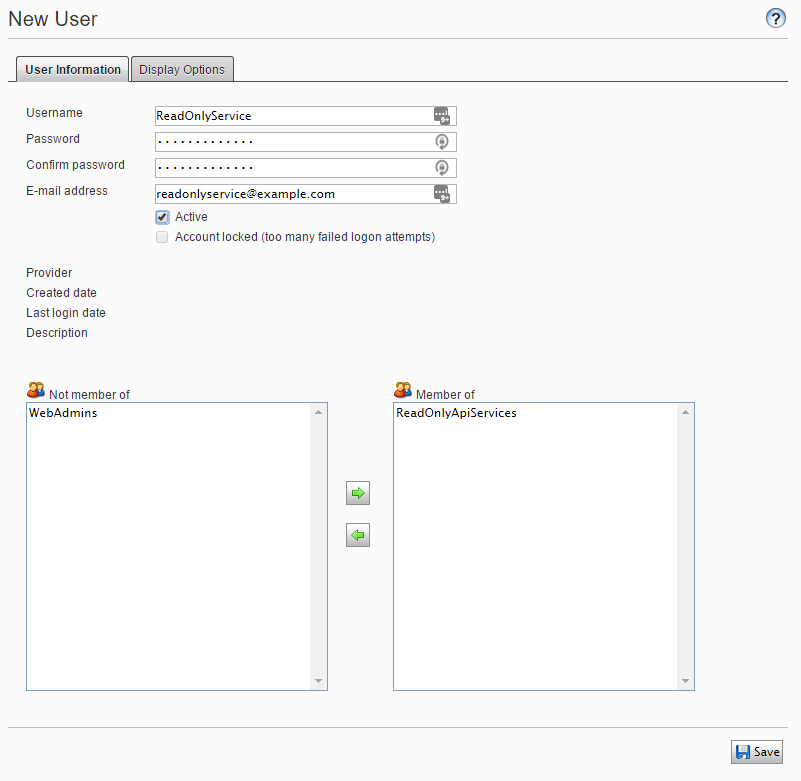
Next step is creating the user. Open Admin -> Create User and fill in Service API user's information. Add the user to the newly created read-only group.
Adding read-only access to Service API
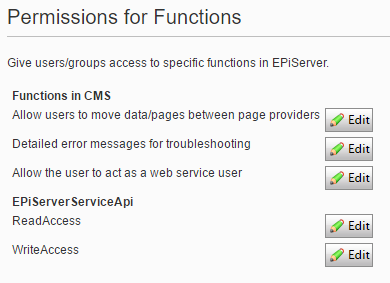
Access to the Service API can be configured under Config -> Permissions for Functions. Here edit ReadAccess under EPiServerServiceApi.
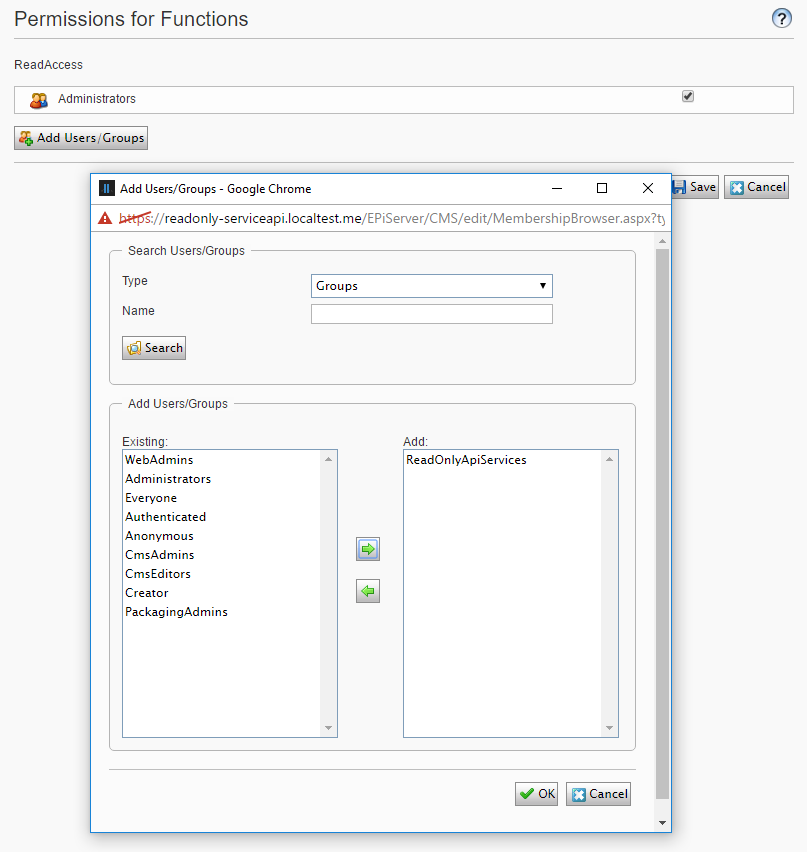
By default, only Administrators are listed here. Add read-only user group here too.
Testing
To test the setup, it is possible to create automated test which authenticates against site's Service API. For this purpose, I have created a base class to use for all Service API tests.
public abstract class ApiTestsBase : IDisposable
{
    private const string Username = "RadOnlyService";
    private const string Password = "Episerver123%";

    protected readonly HttpClient Client;
    private const string IntegrationUrl =
      "https://readonly-serviceapi.localtest.me";

    protected ApiTestsBase()
    {
        ServicePointManager.ServerCertificateValidationCallback +=
            (sender, cert, chain, sslPolicyErrors) => true;
        Client = new HttpClient
        {
            BaseAddress = new Uri(IntegrationUrl)
        };
        Authenticate(Client);
    }

    public void Dispose()
    {
        Client.Dispose();
    }

    private void Authenticate(HttpClient client)
    {
        var fields = new Dictionary<string, string>
            {
                { "grant_type", "password" },
                { "username", Username },
                { "password", Password }
            };
        var response = client.PostAsync(
            "/episerverapi/token",
            new FormUrlEncodedContent(fields)).Result;
        if (!response.IsSuccessStatusCode)
        {
            throw new Exception(
              $"Authentication failed! Status: {response.StatusCode}");
        }

        var content = response
            .Content
            .ReadAsStringAsync()
            .Result;
        var token = JObject
            .Parse(content)
            .GetValue("access_token")
            .ToString();
        client.DefaultRequestHeaders.Authorization =
            new AuthenticationHeaderValue("Bearer", token);
    }
}
First of all, the base class makes sure that SSL certificate validation is ignored as you might have only a local certificate installed which does not validate. Then it makes authentication request against Service API.
The actual authentication test is simple - just assert that no exception is thrown.
public class AuthenticationTests : ApiTestsBase
{
    [Fact]
    public void it_authenticates()
    {
        Assert.True(true);
    }
}
Next step is creating tests against Service API endpoints to get "read-only" data. With a base class in place, it is simple.
public class CatalogTests : ApiTestsBase
{
  [Fact]
  public void it_can_retrieve_catalogs()
  {
      var response =
          Client.GetAsync("/episerverapi/commerce/catalogs")
              .Result;

      Assert.True(response.IsSuccessStatusCode);
      Assert.Equal(response.StatusCode, HttpStatusCode.OK);
  }
}
This test ensures that our user can retrieve catalogs from Service API.
Next test is a little bit more complicated. This test verifies that user is unable to modify anything. For this purpose, I am trying to create a new catalog. I took an example from EPiServer documentation. I took Catalog and CatalogLanguage classes from there.
[Fact]
public void it_fails_to_post_catalog()
{
    var model = new Catalog
    {
        DefaultCurrency = "usd",
        DefaultLanguage = "en",
        EndDate = DateTime.UtcNow.AddYears(1),
        IsActive = true,
        IsPrimary = true,
        Languages = new List<CatalogLanguage>
        {
            new CatalogLanguage
            {
                Catalog = "Test Post",
                LanguageCode = "en",
                UriSegment = "Test Post"
            }
        },
        Name = "Test Post",
        StartDate = DateTime.UtcNow,
        WeightBase = "lbs"
    };
    var json = JsonConvert.SerializeObject(model);
    var response = Client.PostAsync(
        "/episerverapi/commerce/catalogs",
        new StringContent(json, Encoding.UTF8, "application/json")).Result;

    Assert.False(response.IsSuccessStatusCode);
    Assert.Equal(response.StatusCode, HttpStatusCode.Unauthorized);
}
Issues with EPiServer 9
While it is quite easy to setup Service API read-only access in EPiServer 10, I couldn't make it in EPiServer 9. I have stuck on granting access rights to my custom user group. At first, I tried to add read-only rights to the user group directly in the database.

After that user still was not able to access Service API.
Then I tried to setup through UI. But I couldn't find my user group there. Instead, it listed built-in groups and some Windows groups.
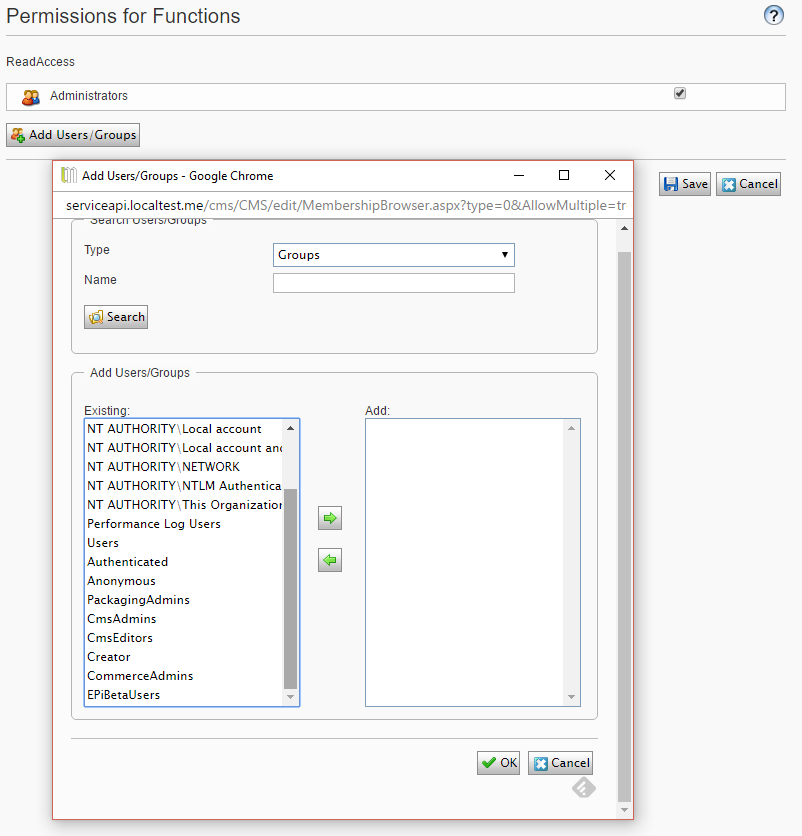
So if you are using ASP.NET Identity package and need a read-only access to Service API, you should upgrade to EPiServer 10.